Cool Modern Lines Improv Baby Quilt


This quilt was a spur-of-the-moment improv creation. I started digging through my scrap drawers a few months ago, and came across a pile of solids that I'd passed over time and time again. Honestly, the colours just didn't feel... current. Deep, mossy greens, grey-blue-green, and something that looked a little like hospital scrubs... not the most inspiring palette at first glance. For some reason I picked them up again, and the colours seemed to take on a new life when paired with cool moody blues and greys, on a background of winter white.


I'm kind of in love with these colours now - the feeling of this quilt reminds me of a lake in the boreal forest, blanketed in fog. The deep green near the top is so spruce tree, and one of my favourite prints seals the deal: the birch trees from Backyard Baby by Michael Miller. I bought this fabric three and a half years ago when I was starting to sew for my daughter's nursery before she was born; I used it in her baby quilt and even had some of it in a frame on her bedroom wall. It will always have a special place in my heart, which makes it hard to part with, but it just felt right in this quilt.


I didn't really have a solid plan when I started cutting, and I've been wanting to incorporate more improv into my work, so I ditched the ruler (a very scary thing for a quilter!) and started slicing and dicing the fabric and putting it back together. I could not be happier with the result... it pays to be brave! It's a good reminder to tiptoe outside my comfort zone more often.

I backed it in a teal print from Joel Dewberry's Botanics collection, and quilted it with organic straight lines to complement the horizontal lines in the piecing. It's bound in Widescreen by Carolyn Friedlander, one of my very favourite neutrals right now. I'm binding another quilt in it at the moment, too, which will be ready for sharing in a few days.

A random encounter with long-forgotten fabrics has turned into a quilt that I am really digging, the process of which has inspired me to flex my improv muscles more often. Don't you think this quilt would be perfect for a modern, gender neutral nursery? I'll be listing it in my Etsy shop tomorrow.

Another teepee!

I had to share a few pictures of this custom teepee that I finished recently. On a side note, I can't believe how much spring has sprung since taking these pictures. It feels as though winter turned to summer here in an instant - the lilacs and tulips have finished blooming, and the leaves are full. It is so easy to forget that we were excited by the first green buds only a short time ago. Spring is kind of my favourite season, with each day being a bit warmer, greener, and more hopeful than the last.


A few weeks ago, a friend of a good friend saw my first DIY teepee on Instagram (link to my first teepee post here), and asked if I could make one for her daughter's second birthday. What a huge compliment! A pretty custom teepee for a sweet little girl's birthday? How could I say no?!


As soon as we'd decided on fabric, I excitedly set out to improve upon my first version. Having already done the thinking and measuring and troubleshooting for the first one, it was easier for me to focus on making Teepee 2.0 neat and beautiful. My client picked out a stunning combination of Cotton + Steel prints for the colourful door - not too girly, but fun and pretty enough to make a statement. I used canvas drop cloth for the panels, which I machine washed, dried and ironed before sewing with (that prep took almost as long as sewing the teepee!).

One of my favourite parts of the teepee!
I also used a nice cotton rope to secure the top, adding an adorable pair of arrowheads to the ends of the rope to finish it off.

Doesn't that look cozy? This one turned out to be even nicer than the one I made for us. Isn't that always the way? I'm thrilled that she is happy with it, and can't wait to see pictures of her two-year old snuggled up inside.

DIY Camera Strap and Cover

A couple of quick finishes this week: a camera strap (including my first foray into sewing leather) and a camera strap cover.

DIY Camera Strap Cover Cotton and Steel Arrows

For the new strap, I used the camera strap tutorial at Ikat Bag. I used my favourite Cotton + Steel arrows print, which is perfect for something long and thin like a camera strap, and I thought was also just asking for some genuine leather end pieces (is there a real term for those?). So, commence my first time sewing with leather. I bought leather needles and heavyweight denim thread, armed myself with some tutorials, and dove in.


Right off the bat I had some major tension issues. The top looked great, but the bottom was loose and loopy. After lots of unpicking, I played with my top/needle tension (I don't remember which way) and finally got it worked out. Not perfectly, but passable. It was still hard enough that I don't think I'll be sewing with leather again any time soon, unless I get a more badass sewing machine. Despite the issues with the leather, though, I am really happy with how the final strap turned out. This one was made for a friend, and the more I look at it, the more I kind of want one for myself. So, I might be sewing with leather again sooner than I planned...

DIY Camera Strap Leather Cotton and Steel
My first time sewing leather!

DIY Camera Strap Cover made with April Rhodes' Arizona Tomahawk Stripe
DIY Camera Strap Cover made using Cluck Cluck Sew's Tutorial


The cover was a relatively quick sew. I followed Cluck Cluck Sew's camera strap cover tutorial, and just adjusted the measurements a bit so that the strap was a better fit. I used April Rhodes' Arizona fabric in Tomahawk Stripe from Art Gallery Fabrics. I just noticed that both of the tutorials I used are totally old school - apparently sewing camera straps and camera strap covers is so two thousand and late (2009, actually). Oh, well - good ideas never go out of style, right?

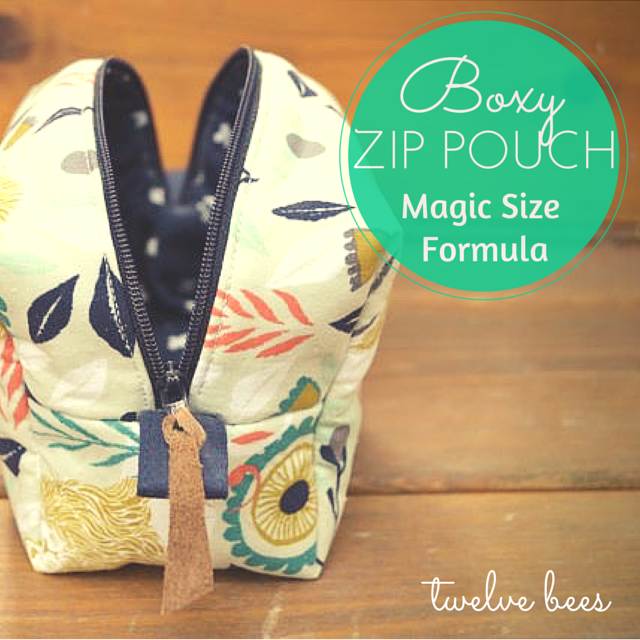
How to Make Any Size Boxy Zipper Pouch


(Warning: it's about to get mathy up in here!)

But, before we go there, have I mentioned how much I enjoy sewing custom orders? I love the challenge of figuring out a new type of project that I haven't tackled before. I get to add some new skills to my sewing toolbox, and I get to (hopefully) make someone happy at the same time... win-win, in my books.


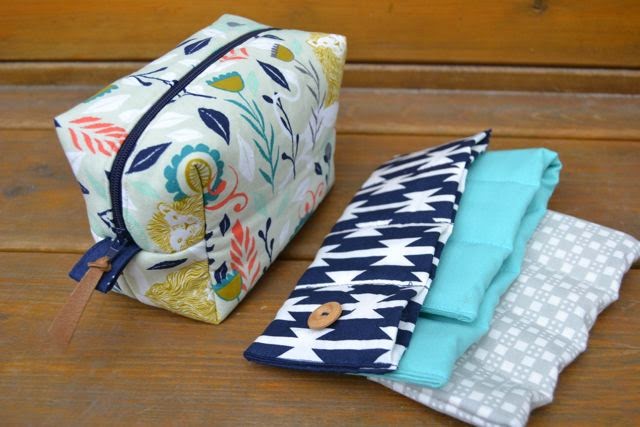
This time, a friend asked me to sew a zipper pouch to hold her essential oil droppers and roller bottles. She gave me the dimensions of her bottles, asked only that the pouch be pretty and close with either a zipper or a fold, and include some sort of insert to keep the glass bottles separated and protected when she throws them in her purse.


I found excellent tutorials for fully-lined boxy zipper pouches at Pretty Modern and Pink Stitches. I flipped back and forth between them while sewing this one, just because I found it useful to have different photos and descriptions of the steps as I went along. The only trouble I had was with figuring out how to construct the bag so that it ended up the size I wanted it to be (the tutorials were for slightly bigger pouches than I needed). After doing lots of math and sketching and reading, I came across the Magic Formula for Boxy Zip Pouches posted deep in the comments of Pretty Modern's tutorial. So, without further ado, the "magic" formula for making a boxy zipper pouch any size is:


Is that confusing enough? Ha. The graphic is a bit of a mess, but I wanted to share it since it took me the better part of an hour to track down the formula and then figure out how to use it to get the size of pouch I was after. Now, hopefully, you won't have to (as long as it doesn't take you an hour to figure out what I'm talking about!). Here's how I did my calculations:

I wanted my finished pouch to measure 7"(L) x 3"(W) x 4"(H), and I'd use a seam allowance of 1/2".

So, I cut my two outer and two lining pieces 12" x 8", which I calculated as follows:

Length 
= L + H + 2 x seam allowance
= 7" + 4" + (2 x 1/2")
= 12"

Width
= H + W + 2 x seam allowance
= 4" + 3" + (2 x 1/2")
= 8"

Box Corners
= 1/2 H
= 1/2 (4")
= 2" up from corner point

Once you have your pieces cut out, you just have to follow one of many great tutorials out there for sewing a lined boxy zipper pouch, remembering to box the corners using the measurement you worked out for your size of pouch.

The "magic formula" worked like a charm for me. My finished pouch measures approximately 7" long x 3" wide x 4" high, just what I was aiming for. I used a little piece of leather as a zipper pull accent, which I love alongside the Cotton + Steel fabric I used for the outside and lining of the bag. I also made three little inserts to hold the essential oil bottles, which should work well (and look cute, too). 


I listed it in my Etsy shop for her to buy - my first Etsy listing, and my first sale! I'm aiming to get a few more things listed in the coming weeks, so hopefully it's just the first of many. Next on the learning list - product photography...
Related Posts Plugin for WordPress, Blogger...