Showing posts with label custom order. Show all posts

A Purple and Green Herringbone Toddler Quilt

Word of mouth is really the best advertising, especially when it comes to handmade quilts. A sweet client who is a friend of a friend of a friend approached me recently to ask about a quilt for her toddler. She had seen a quilt that I'd made for a friend of hers (this one, actually), and loved it; she'd always wanted a quilt for her daughter but hadn't known who to ask until she found out that I do custom quilts.

She had a really good idea of what she was looking for. In fact, she already had this picture of an adorable baby quilt made by Jess of Craftiness Is Not Optional, which she loved. We brainstormed a bit about different patterns that I could do that were similar, but in the end we decided to stick pretty true to her original inspiration*.

*I did however use a different method for piecing than used for the inspiration quilt. I strip-pieced in sections and cut strips diagonally, then flipped and rearranged in sections until I found a layout that worked. Sort of like this tutorial. I took a few photos along the way, so I'll post more about how I did it once I get around to it.

My client requested the colour scheme based on the colours in her daughter's bedroom, and I searched high and low for purple and green fabrics that fit the bill and looked good together. The fabric hunt was harder than I anticipated. Purples are funny - even though I'm really drawn to shades of purple (especially lavender), I don't actually sew with them a lot, because I find that they can be really tricky to mix and match (well) with other colours. Which is especially ironic given that, as Fancy Nancy tells us, lavender goes well with almost anything (Anybody? No? ...Maybe I'm the only one whose reading material consists mainly of toddler lit...).


I ended up going with fabrics from Joel Dewberry's classic and lovely Aviary 2 collection, as well as Feeling Groovy by Michael Miller, two older fabric collections which I managed to track down at Hawthorne Threads in the U.S. I added in some Kona Lilac and a lavender/lilac blender from Moda that I had on hand in my stash. All mixed together on a crisp background of Kona White, I think the colours are fresh and cool and girly without being too girly - I absolutely love it.


I backed it with some herringbone pieces left over from piecing the front, and a big piece of Joel Dewberry print, along with more Kona White. 


I even managed to sneak the name of the quilt's recipient into the quilting. I hope she gets years and years of cuddles under her very own quilt.

We (me, my husband, kids, dog, and quilt) took advantage of the hot, sunny weather to take a walk down to some old mill ruins near our house here in Guelph and photograph the quilt in the wild. Lots of #quiltswithfeet (look up that hashtag on Instagram, it's hilarious) but no #husbandsholdingquilts this time (another one that I get a huge kick out of)... I did the honours myself while two kids screamed in the Chariot jogging stroller that they wanted to "Seeeeeeee the quillllllllt!" and "She's eating my cheeeeeeeesestrinnnnnngggg!" Don't these photos look idyllic? Good thing there's no audio on blog photos. Ha.


This one's a keeper, and even though it's a colour scheme that I don't think I would have chosen on my own, I love it. I actually have a few more herringbone scraps left over here that I'm planning to use to make a scrappy sampler quilt with similar colours... so I don't think I'm done with purple and green yet.

Custom Interlock Baby Quilt

Interlock Baby Quilt by Twelve Bees

Another day, another custom quilt to share!

My client was looking for a show-stopping custom quilt for a very close friend's baby shower. I was relieved when she told me she was able to sneak a few clues about baby boy's nursery, which always helps me decide on colours and design, especially when I'm creating for someone I've never met. Quilts can be so personal!

Assignment: sew a baby quilt to go with this pillow.

Then, she sent me this picture. And told me that baby's nursery colours are turquoise, grey, and white. Okay, at least I got some colours! But not much to go on, really. So I had to make some extrapolations from this picture of the cushion. Hmm... from this I get geometric, classic, clean lines, with a sophisticated feel. Even the conservative tan wall colour and Burberry-esque plaid on the stool points me in a similar direction, so as long as this picture was taken in my client's friend's house, I think I have a decent starting point. (Or it was snapped in a store as she was shopping and I'm reading wayyy too much into a picture of a pillow.)

To fit with this elaborate backstory that I projected onto a single cushion, I decided on a simple geometric design with a bit of mixing up of prints and textures (my favourite). The Interlock pattern by Amy Friend of During Quiet Time was the perfect design. It can be found in the Winter 2015 issue of Modern Patchwork and Quilting, but Amy was kind enough to let me know that as of November 2015 she will be offering the pattern for sale herself as well, through her pattern shop. (This is the time for a quick side note on how kind and generous even the busiest and most well-known quilters are - within an hour of my posting this quilt on Instagram, Amy herself commented that it was lovely, and let me know that she'll have the pattern for sale in a few months. I love quilters!)

Interlock Baby Quilt by Twelve Bees

The pattern is for a throw-sized quilt, so for a large baby quilt I reduced it to a 2 x 4 block layout. It ended up measuring about 45" x 48", which is an awkward width for a quilt... juuuuust too wide to fit a single piece of backing fabric. So I used the scraps leftover from the front to piece a 2.5" wide scrappy strip down the backing, which added just the right amount of width. If I were to make this as a baby quilt again, I'd scale down the width of the blocks a bit so that the quilt top would fit a single width of backing piece. I don't mind piecing backings, but with baby quilts it's nice to just get it done simply sometimes, you know? (Although I do think the pieced backing looks great on this quilt.)

Interlock Baby Quilt by Twelve Bees

I initially had a hard time finding the right shade of muted turquoise to coordinate with the cushion. And the fact that it was for a boy added another layer of challenge - there are always so many more options that involve florals or more "girly" prints. I spent the better part of an hour at my local quilt shop (the fantastic Greenwood Quiltery) before I settled on this combination of blues and greys from Doe by Carolyn Friedlander, with some grey Widescreen (which I also used for binding), a blue kite tails print from Lotta Jansdotter, and grey Pearl Bracelets from Lizzy House. I initially wanted to mix in some pops of yellow, but decided to be conservative based on my (fairly baseless) assumptions about the quilt's recipient. Hilary from Greenwood agreed (and we had a little too much fun inventing a backstory for these people and what they would like based on their cushion choices...), so we played it safe and stuck with blues and greys.

Interlock Baby Quilt by Twelve Bees


I quilted it with a mix of free motion stippling and straight lines, to soften the strong geometric lines and emphasize the pattern. I waffled a bit on how to quilt it (I always do), but I think it turned out nicely.

The Interlock pattern was well-written, and the quilt was simple to cut and piece and fun to put together. I don't often make the same quilt twice, but I can see myself using this pattern again. With a few changes of colour and fabric, it could look like a totally different quilt... scrappy colourful background with white/grey/low volume lines, anyone? I'm pretty confident that once Amy releases it herself, this one's going to be a huge hit.

Interlock Baby Quilt by Twelve Bees

Once it was all finished, I got to tie it up in a pretty package with one of my new tags and give it to a thrilled client (who assured me that her friend would love it - and that if she didn't, she'd gladly keep it for herself!). All in a day's work. :)

Another teepee!

I had to share a few pictures of this custom teepee that I finished recently. On a side note, I can't believe how much spring has sprung since taking these pictures. It feels as though winter turned to summer here in an instant - the lilacs and tulips have finished blooming, and the leaves are full. It is so easy to forget that we were excited by the first green buds only a short time ago. Spring is kind of my favourite season, with each day being a bit warmer, greener, and more hopeful than the last.


A few weeks ago, a friend of a good friend saw my first DIY teepee on Instagram (link to my first teepee post here), and asked if I could make one for her daughter's second birthday. What a huge compliment! A pretty custom teepee for a sweet little girl's birthday? How could I say no?!


As soon as we'd decided on fabric, I excitedly set out to improve upon my first version. Having already done the thinking and measuring and troubleshooting for the first one, it was easier for me to focus on making Teepee 2.0 neat and beautiful. My client picked out a stunning combination of Cotton + Steel prints for the colourful door - not too girly, but fun and pretty enough to make a statement. I used canvas drop cloth for the panels, which I machine washed, dried and ironed before sewing with (that prep took almost as long as sewing the teepee!).

One of my favourite parts of the teepee!
I also used a nice cotton rope to secure the top, adding an adorable pair of arrowheads to the ends of the rope to finish it off.

Doesn't that look cozy? This one turned out to be even nicer than the one I made for us. Isn't that always the way? I'm thrilled that she is happy with it, and can't wait to see pictures of her two-year old snuggled up inside.

How to Make Any Size Boxy Zipper Pouch


(Warning: it's about to get mathy up in here!)

But, before we go there, have I mentioned how much I enjoy sewing custom orders? I love the challenge of figuring out a new type of project that I haven't tackled before. I get to add some new skills to my sewing toolbox, and I get to (hopefully) make someone happy at the same time... win-win, in my books.


This time, a friend asked me to sew a zipper pouch to hold her essential oil droppers and roller bottles. She gave me the dimensions of her bottles, asked only that the pouch be pretty and close with either a zipper or a fold, and include some sort of insert to keep the glass bottles separated and protected when she throws them in her purse.


I found excellent tutorials for fully-lined boxy zipper pouches at Pretty Modern and Pink Stitches. I flipped back and forth between them while sewing this one, just because I found it useful to have different photos and descriptions of the steps as I went along. The only trouble I had was with figuring out how to construct the bag so that it ended up the size I wanted it to be (the tutorials were for slightly bigger pouches than I needed). After doing lots of math and sketching and reading, I came across the Magic Formula for Boxy Zip Pouches posted deep in the comments of Pretty Modern's tutorial. So, without further ado, the "magic" formula for making a boxy zipper pouch any size is:


Is that confusing enough? Ha. The graphic is a bit of a mess, but I wanted to share it since it took me the better part of an hour to track down the formula and then figure out how to use it to get the size of pouch I was after. Now, hopefully, you won't have to (as long as it doesn't take you an hour to figure out what I'm talking about!). Here's how I did my calculations:

I wanted my finished pouch to measure 7"(L) x 3"(W) x 4"(H), and I'd use a seam allowance of 1/2".

So, I cut my two outer and two lining pieces 12" x 8", which I calculated as follows:

Length 
= L + H + 2 x seam allowance
= 7" + 4" + (2 x 1/2")
= 12"

Width
= H + W + 2 x seam allowance
= 4" + 3" + (2 x 1/2")
= 8"

Box Corners
= 1/2 H
= 1/2 (4")
= 2" up from corner point

Once you have your pieces cut out, you just have to follow one of many great tutorials out there for sewing a lined boxy zipper pouch, remembering to box the corners using the measurement you worked out for your size of pouch.

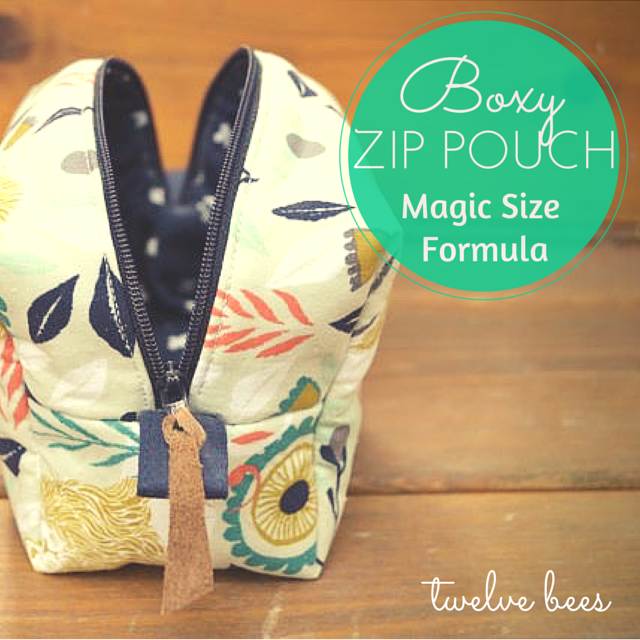
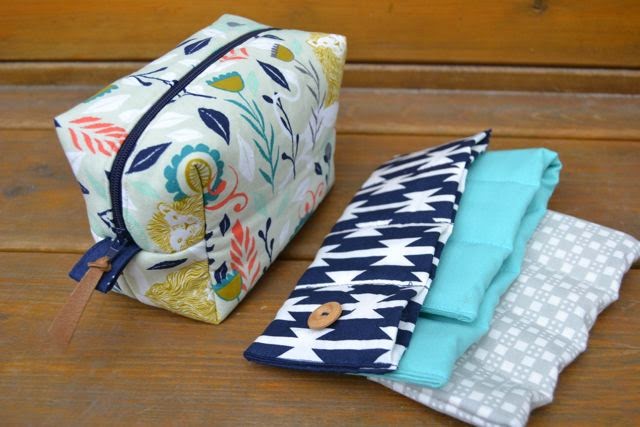
The "magic formula" worked like a charm for me. My finished pouch measures approximately 7" long x 3" wide x 4" high, just what I was aiming for. I used a little piece of leather as a zipper pull accent, which I love alongside the Cotton + Steel fabric I used for the outside and lining of the bag. I also made three little inserts to hold the essential oil bottles, which should work well (and look cute, too). 


I listed it in my Etsy shop for her to buy - my first Etsy listing, and my first sale! I'm aiming to get a few more things listed in the coming weeks, so hopefully it's just the first of many. Next on the learning list - product photography...
Related Posts Plugin for WordPress, Blogger...